
What are Custom Meta Boxes
To put it simply, a custom meta box provides you a funnel to add more custom information to your posts, based on the absolute specifics around it. While Wordpress lets you do the same with its default provisions for image, categories, tags and so on, but there are times when these defaults do not cut the ice with you.
Let's say you are building a website that catalogs a wide range of vintage cars. Each post on the site is meant to be centered around a particular car. Now, you can add the image of the car, the name of the car in the title, its description and the corresponding tags. But, if you wish to include meta data about the car's model number, how are you supposed to go on with it when Wordpress does not give you any such provision? Well, this is where the custom meta boxes have a role to play.
What a custom meta box typically does is that it appears as a box on the post editing screen which lets you to add custom data to a Wordpress post or page. Because it appears in the post editor, even a novice can easily make use of it to input additional information in a piece of content.
How To Add the Meta Box
Adding meta box to your Wordpress theme is mostly about making the necessary tweaks in the functions.php file.
The beginnings
Add the below code in the theme's functions.php file:
function wdm_add_meta_box() {
   add_meta_box('wdm_sectionid', 'Make This Post Featured', 'wdm_meta_box_callback', 'post');
}
add_action( 'add_meta_boxes', 'wdm_add_meta_box' );
Code Explained:
add_meta_box: It is a function that takes input some parameters in order to communicate to Wordpress about the inclusion of meta box.
wdm_sectionid: It represents the HTML 'id' attribute of the edit screen
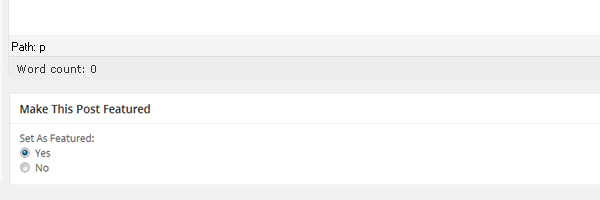
Make This Post Featured: It is the title of the edit screen
wdm_meta_box_callback: It is a function that prints out the HTML for the edit screen.
Post: this is for metabox to appear on page screen or post you can use page if you want to use this meta box on page screen.
add_action( 'add_meta_boxes', 'wdm_add_meta_box'): This is a Wordpress action hook that instructs the Wordpress setup to add the metabox.
Generating the HTML Output
And now, we will be generating the HTML output which will also make it possible for us to use any HTML tags we please:
function wdm_meta_box_callback( $post ) {
   wp_nonce_field( 'wdm_meta_box', 'wdm_meta_box_nonce' );
   $value = get_post_meta( $post->ID, 'featured', true );
?>

   <label for="wdm_new_field"><?php _e( "Set As Featured:", 'set_as_featured' ); ?></label>
   <br />
   <input type="radio" name="featured" value="yes" <?php checked( $value, 'yes' ); ?> >Yes<br>
   <input type="radio" name="featured" value="no" <?php checked( $value, 'no' ); ?> >No

<?php
}
Saving Metabox Value to Wordpress Database
Now, we will use the function wdm_save_meta_box_data( $post_id ) for effecting the value save process. This function fetches the post id so that the metabox value is saved onto the particular post meta session in database.
add_action( 'save_post', 'wdm_save_meta_box_data' ): This is an wordpress hook to tell wordpress to save post with meta value.
Here is how we use both in the code:
function wdm_save_meta_box_data( $post_id ) {
   if ( !isset( $_POST['wdm_meta_box_nonce'] ) ) {
      return;
   }
   if ( !wp_verify_nonce( $_POST['wdm_meta_box_nonce'], 'wdm_meta_box' ) ) {
      return;
   }
   if ( defined( 'DOING_AUTOSAVE' ) && DOING_AUTOSAVE ) {
      return;
   }
   if ( !current_user_can( 'edit_post', $post_id ) ) {
      return;
   }
   $new_meta_value = ( isset( $_POST['featured'] ) ? sanitize_html_class( $_POST['featured'] ) : '' );
   update_post_meta( $post_id, 'featured', $new_meta_value );
}
add_action( 'save_post', 'wdm_save_meta_box_data' );
And thus, we have created a metabox in its simplest form. It can be used for a variety of purposes, but when you need something more dynamic and rich in information, you'll need to branch out and get involved in more coding.
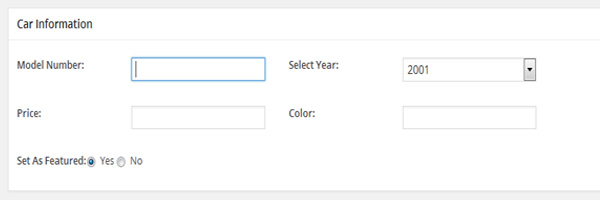
Let us take the earlier example about cars forward. When we are publishing a post on car, not all the information we need can be included in meta data provided by default in Wordpress. We will use custom metabox for the purpose. And this is how we will go about our task:
// We will first create a textbox for the car model number
<p>
   <label>Model Number: </label>
   <input type="text" name="car_model_number"/>
</p>
// Now, lets write the code for generating the list of cars by model years
<p>
   <label>Select Year: </label>
   <select name ="model_year">
       <option value="2001">2001</option>
       <option value="2002">2002</option>
       <option value="2003">2003</option>
       <option value="2004">2004</option>
       <option value="2005">2005</option>
       <option value="2006">2006</option>
       <option value="2007">2007</option>
       <option value="2008">2008</option>
       <option value="2009">2009</option>
       <option value="2010">2010</option>
       <option value="2011">2011</option>
   </select>
</p>
// Here is the code for a textbox that represents car price:
<p>
   <label>Price: </label>
   <input type="text" name="car_price"/>
</p>
// Here is the code to generate the textbox for car colors
<p>
   <label>Color: </label>
   <input type="text" name="car_color"/>
</p>
We thus far have different textboxes for our extended meta data. These represent car colors, prices, and model numbers. How they are displayed can be figured out from the figure.
And now, we move on to creating radio buttons for our sites, which will give us the choice of setting our post as featured or not. So, let us write a simple enough code for the same:
// Below code generate the radio button
<p>
   <label for="wdm_new_field"><?php _e( "Set As Featured:", 'set_as_featured' ); ?></label>
   <input type="radio" name="featured" value="yes" <?php checked( $value, 'yes' ); ?> >Yes
   <input type="radio" name="featured" value="no" <?php checked( $value, 'no' ); ?> >No
</p>
// Of course, we also need the autosave feature for future reference. And here is how we code for it:
function wdm_save_meta_box_data( $post_id ) {
   if ( !isset( $_POST['wdm_meta_box_nonce'] ) ) {
      return;
   }
   if ( !wp_verify_nonce( $_POST['wdm_meta_box_nonce'], 'wdm_meta_box' ) ) {
      return;
   }
   if ( defined( 'DOING_AUTOSAVE' ) && DOING_AUTOSAVE ) {
      return;
   }
   if ( !current_user_can( 'edit_post', $post_id ) ) {
      return;
   }
}
For successful implementation, we need to fetch values from the above HTML tags. Here is the code for the same:
// below code take value from above html tags
$new_meta_value = ( isset( $_POST['featured'] ) ? sanitize_html_class( $_POST['featured'] ) : '' );
$model_number = ( isset( $_POST['model_year'] ) ? sanitize_html_class( $_POST['model_year'] ) : '' );
$price = ( isset( $_POST['car_price'] ) ? sanitize_html_class( $_POST['car_price'] ) : '' );
$car_color = ( isset( $_POST['car_color'] ) ? sanitize_html_class( $_POST['car_color'] ) : '' );
// The next step is to insert the post meta data in the Wordpress database:
update_post_meta( $post_id, 'featured', $new_meta_value );
update_post_meta( $post_id, 'model_year', $model_number );
update_post_meta( $post_id, 'car_price', $model_number );
update_post_meta( $post_id, 'car_color', $model_number );
// update_post_meta: This function takes three parameters – the first one is post id, the second one is metakey, and third one is meta value.
Making the meta box look visually more appealing will only serve our purpose, and in a good way. So, if styling your metabox is on the agenda, add the following code:
function wdm_admin_styles(){
   global $typenow;
   if( $typenow == 'post' ) {
      wp_enqueue_style( 'prfx_meta_box_styles', get_template_directory_uri(). '/css/meta-box-styles.css' );
   }
}
add_action( 'admin_print_styles', 'wdm_admin_styles' );
What this code does is that it adds the meta-box-styles.css in your template directory. In this directory, you are free to can add your desired style that you deem suitable enough to enhance the visual appeal.
We thus conclude the process of creating and utilizing metabox in Wordpress easily and efficiently. If you have any questions regarding the exercise, do let us know in the comment section below.
 Web developer, jQuery plugin author, social media fan and Technology Blogger.
Wow its really amazing buddy keep going really nice to see this stuff :-)